Need to know how to fix a sagging wooden gate? Discover proven methods and tools that work to restore function and extend gate life.
If you’ve been dealing with a gate that drags, sticks, or won’t close properly, you’re not alone. A sagging wooden gate is a common issue for homeowners, especially as materials age or hardware loosens. Whether it’s due to gravity, weather exposure, or poor construction, it’s a problem that can worsen if left unaddressed.
Knowing how to fix a sagging wooden gate doesn’t just improve curb appeal—it helps secure your property, prevents future damage, and avoids costly replacements. The good news is that many cases of sagging can be corrected with the right tools and a few simple adjustments.
This blog will walk you through step-by-step solutions, from quick fixes to reinforcement methods, so you can get your gate back on track..
Check the Cause First: Why Is Your Wooden Gate Sagging?
Before you start fixing your gate, it’s important to understand how to fix a sagging wooden gate the right way. Take a moment to figure out why it’s sagging. There are several reasons this can happen, and understanding the cause will help you correct it, saving you time and effort.
Common reasons for gate sagging include:
- Loose or Rusted Hinges: Over time, the hardware that holds your gate in place can become loose or corroded, causing the gate to shift, lean, or sag under its weight.
- Weak or Rotten Gate Posts: If the posts supporting your gate are damaged, rotting, or not firmly anchored in the ground, they won’t be able to support the gate properly, leading to sagging and instability.
- Improper Weight Distribution: Sometimes, the way a gate is constructed or installed can cause uneven pressure on its hinges and frame, making it more likely to sag over time.
- Wood Warping Due to Moisture or Age: Wooden gates are especially vulnerable to the elements. Moisture, temperature changes, and general aging can cause the wood to warp, twist, or shrink, all of which can cause the gate to become misaligned.
Take your time to thoroughly inspect each part of the gate — the hinges, posts, frame, and panels. Pay close attention to any signs of wear, rust, rot, or warping. By pinpointing the exact cause, you can choose the repair method that addresses the problem and ensures your gate remains strong and secure for years to come.
Adjust Hinges and Fasteners to Restore Alignment
One of the most common causes of a sagging wooden gate is loose, worn-out, or improperly installed hinges. Over time, the constant strain of opening and closing the gate, along with weather exposure, can cause the hinges to shift or weaken. Fortunately, restoring alignment is often a straightforward process if you follow these steps:
1. Tighten and Realign Existing Hinges
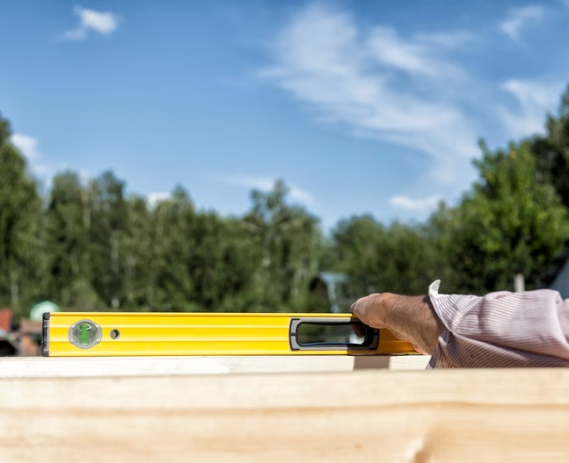
Start by inspecting the gate with a carpenter’s level to assess how far out of alignment it is. Place the level vertically along the side of the gate and horizontally across the top to check for any tilt or sagging.
Focus first on the upper hinge, as this is typically where sagging begins. Using a screwdriver or drill, tighten all the screws firmly. Pay special attention to any screws that appear loose or backed out.
If you notice that the screw holes have become stripped and the screws won’t tighten properly, you have a few options:
- Fill the holes with wood filler, allow it to dry completely, then reinstall the screws.
- Use longer or thicker screws to reach deeper, sturdier wood.
- Insert wooden dowels coated with wood glue into the stripped holes, then re-drill new pilot holes for the screws.
While you’re at it, inspect the hinges for any signs of rust, corrosion, or bending. If the hinges are damaged, it’s best to replace them with new heavy-duty, galvanized steel hinges, which are designed to resist weather damage and hold the gate securely for years to come.
2. Upgrade to Adjustable Hinges for Lasting Results
If, after tightening and minor repairs, the gate still shows signs of sagging or uneven swinging, it may be time to upgrade to adjustable gate hinges. These specially designed hinges enable you to make fine adjustments even after the gate is installed, ensuring it remains perfectly aligned over time.
Adjustable hinges typically include tension bolts or nuts that can be loosened or tightened to raise, lower, or straighten the gate without needing to obliterate it. This is especially helpful in areas with fluctuating temperatures and humidity levels, where wood expansion and contraction can lead to seasonal shifts.
Reinforce the Gate Frame for Long-Term Fixes
Even with well-adjusted hinges, a sagging wooden gate can remain a problem if the frame itself has weakened over time. Wooden gates are constantly exposed to the elements and daily stress, which can lead to warping, loosening joints, or a loss of overall structural integrity. To ensure a long-lasting fix and prevent future sagging, reinforcing the gate frame is a smart move. Here’s how:
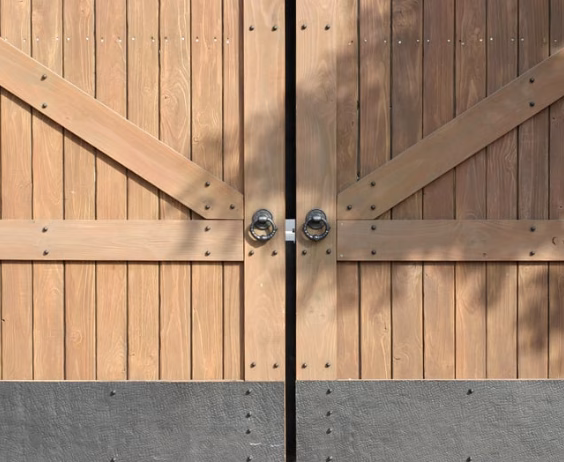
1. Add Diagonal Cross Bracing
One of the most effective ways to strengthen a gate frame is by installing a diagonal cross brace. This simple addition helps redistribute the gate’s weight, transferring the downward pull away from the hinges and stabilizing the entire structure.
- Placement Matters: Position the brace so it runs from the lower hinge-side corner up to the opposite upper corner. This configuration counteracts the natural sagging motion and supports the gate’s weight more effectively.
- Material Choices: You can use a sturdy 2×4 piece of pressure-treated lumber for a traditional look, or opt for a galvanized steel brace for a more heavy-duty, weather-resistant solution.
- Secure Attachment: Bolt or screw the brace securely to the frame using heavy-duty fasteners. Avoid relying solely on nails, as they can loosen over time. Make sure the brace is tight enough to resist shifting or flexing under pressure.
2. Install Corner Brackets for Additional Strength
Another brilliant reinforcement technique is to add steel corner brackets at each corner of the gate frame. These brackets provide extra rigidity and help maintain the frame’s squareness, especially in older gates where wood joints may have begun to separate.
- Durable Hardware: Select rust-resistant, galvanized, or stainless steel brackets to ensure longevity, particularly for gates exposed to rain, snow, or high humidity.
- Proper Installation: Attach the brackets securely with strong wood screws, making sure each bracket sits flush against the frame. Use a level to confirm the corners are square before tightening everything into place.
- Extra Tip: If your gate has already warped slightly, you should realign the frame first by gently clamping it into a square position before installing the brackets.
By reinforcing the frame with cross bracing and sturdy corner brackets, you’ll not only correct any existing sag but also significantly extend the life and stability of your gate. These improvements help ensure your gate remains functional, attractive, and durable for years to come.
Fix the Posts—A Commonly Overlooked Cause
While it’s easy to focus on the gate itself when addressing sagging or alignment issues, many problems start with the posts that support the gate. If the posts are unstable, leaning, or shifting in the ground, even the strongest gate and hinges won’t stay properly aligned for long. That’s why inspecting and stabilizing the posts is a crucial part of any long-term fix. Here’s how to tackle it:
1. Check Post Alignment
Begin by using a post level or a regular level to check if the gate posts are perfectly plumb (vertically straight). Attach the level to two adjacent sides of the post to check in both directions. Even a slight lean can cause significant sagging in the gate over time.
If you notice any lean or movement when the gate is opened or closed, it’s a sign that the post needs serious attention.
2. Reset Leaning Posts in Concrete
If a post is leaning, the best solution is to re-dig and reset it properly:
- Remove the post carefully, digging out the surrounding soil and old concrete if necessary.
- Reposition the post in a deeper and wider hole—typically at least 2 feet deep or one-third the post’s height— for better stability.
- Set the post in fresh concrete, making sure it is perfectly plumb before the concrete sets. Brace the post with temporary supports if needed while it cures, typically over 24–48 hours.
Using concrete ensures that the post resists soil shifting, frost heave, and other environmental forces over time.
3. Reinforce Aging Wooden Posts with Steel Anchors
If your posts are still in decent shape but starting to show signs of aging, such as minor rot at the base, you might not have to replace them completely. Instead, you can install steel post anchors:
- These brackets cradle the base of the post and are secured to a concrete footing.
- They help isolate the wood from soil moisture, reducing rot and providing extra structural support.
Use galvanized or stainless steel anchors for long-lasting performance outdoors.
4. Inspect the Fence Connection
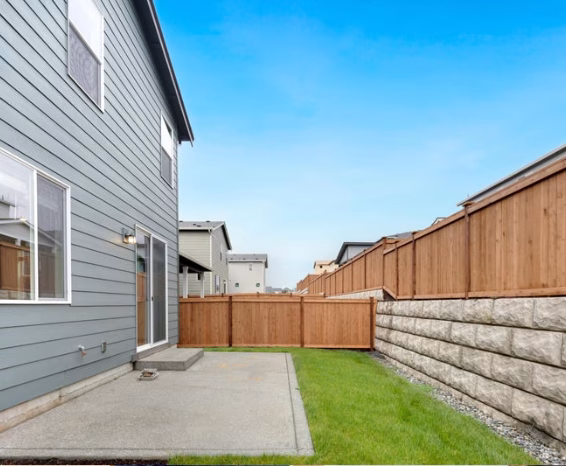
If your gate is attached to a larger fence structure, don’t forget to check the health of the fence itself. A weak or sagging fence can pull on the gate post and cause it to lean or move out of alignment.
Look for signs like:
- Loose or broken fence rails
- Rotting or cracked posts within the fence line
- Gaps or separations between fence panels and posts
Strengthen any weak sections of the fence and ensure they are properly secured before finalizing the gate repairs. Otherwise, even a reinforced post could eventually be dragged off balance again.
Install a Gate Repair Kit: Easy DIY Option
For quick and effective sag correction, a gate anti-sag kit can be a great solution. These kits usually include:
- Steel Cable System: A strong, weather-resistant cable designed to run diagonally across the gate, counteracting the forces that cause sagging.
- Corner Brackets: Metal brackets that attach to the gate frame at strategic points to secure the cable and add extra stability.
- Mounting Hardware: Screws, bolts, and a turnbuckle (a metal tensioning device) that allow you to adjust and tighten the cable for precise realignment easily.
The cable runs diagonally across the gate and uses a turnbuckle to tighten and pull the gate into alignment.
Upgrade Hardware for Long-Lasting Results
Sagging isn’t always about wood—hardware plays a key role in long-term gate performance.
- Use longer screws or lag bolts into studs or posts.
- Replace old latches with those rated for outdoor use.
- Lubricate hinges and latches to ensure smooth movement.
Investing in quality gate hardware helps prevent future issues and makes your repair job last.
Frequently Asked Questions
What causes a wooden gate to sag?
Common causes include loose hinges, weak posts, warped wood, or poor initial construction.
How do you straighten a sagging wooden gate?
Tighten or replace hinges, add cross bracing, or use an anti-sag kit to pull the gate back into alignment.
Can you fix a sagging gate without replacing it?
Yes. Most sagging gates can be fixed with hardware adjustments, bracing, or reinforcement.
Do gate repair kits work?
Yes, anti-sag gate kits are effective for diagonal tensioning and are a simple DIY option for many homeowners.
When should I replace my wooden gate?
Replace the gate if the wood is rotted, the frame is warped, or structural integrity can’t be restored.
Conclusion
Dealing with a sagging wooden gate doesn’t have to be complicated or expensive. If you’re wondering how to fix a sagging wooden gate, the good news is that with the right tools and steps, you can typically resolve most alignment and structural issues on your own. Simple solutions, such as hinge tightening, diagonal bracing, or a repair kit, can go a long way toward extending your gate’s life.
That said, not every sagging gate is worth saving. If you have extensive wood damage or shifting posts, it may be time for replacement. Newer gate systems are stronger, longer-lasting, and can be designed with automatic features for added security.
No matter the situation, Central Valley Gates & Access Controls is here to help. Whether you’re looking for professional repair, gate replacement, or upgrading to an automated system, our team brings the experience and quality you can trust.
End Note
Central Valley Gates & Access Controls is more than gate installers—we’re craftsmen. Whether you’re dealing with a sagging wooden gate or considering an upgrade, our team delivers custom solutions with a focus on durability and style. We offer a wide selection of materials, including wood, wrought iron, and steel gates, all crafted with expert precision.
Founded by Pat, our company was built on principles of integrity and reliability. From automatic gate repairs to custom slide gates and advanced security setups, we proudly serve homes throughout Sacramento County and Placer County. Our commitment to quality assurance and complete customer satisfaction backs every project.
Want to learn more about our mission and services? Visit our About Us page, browse our customer reviews, or get started by contacting us today. For daily project inspiration, follow us on Facebook and Instagram. At Central Valley Gates & Access Controls, excellence is more than a promise—it’s our standard.