Learn how to program a LiftMaster gate opener with a remote and keypad in a few simple steps. Follow our expert guide to make sure your LiftMaster gate functions efficiently and securely.
LiftMaster is one of the most trusted names in gate and garage door automation. Known for its reliability and advanced features, a LiftMaster gate opener ensures secure access to residential or commercial properties. Whether you’re upgrading or setting up a new access system, understanding how to program your LiftMaster gate opener with a remote and keypad is essential for seamless operation.
Programming your LiftMaster gate opener is not as complex as it may seem. With the proper guidance, you can sync your remote controls and keypads in just a few minutes. Whether you are dealing with a new installation or reprogramming due to system updates or security concerns, this guide will provide a step-by-step explanation.
This blog focuses on how to program a LiftMaster gate opener using both the remote and the keypad. Read on to ensure your LiftMaster gate opener is optimized for convenience and safety.
How to Program LiftMaster Gate Opener with Remote: A Step-by-Step Guide
Programming your LiftMaster gate opener remote is a simple process, but it must be done carefully to ensure proper operation. Whether you’re replacing a lost remote or adding a new one, follow this structured guide for successful setup.
What You’ll Need
Before you begin, make sure you have the following items ready:
- Your LiftMaster remote control
- Access to the LiftMaster gate operator’s control panel
- A ladder (if the motor/control panel is mounted high)
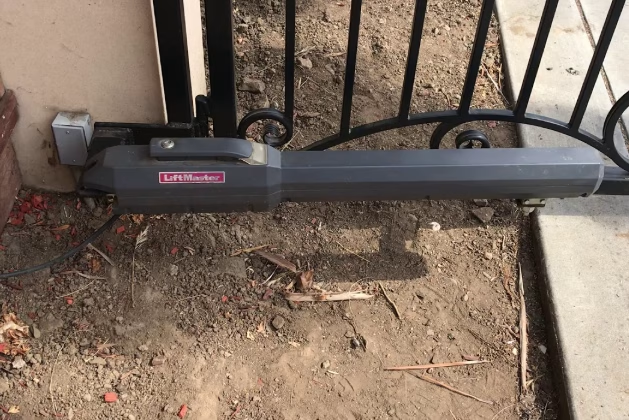
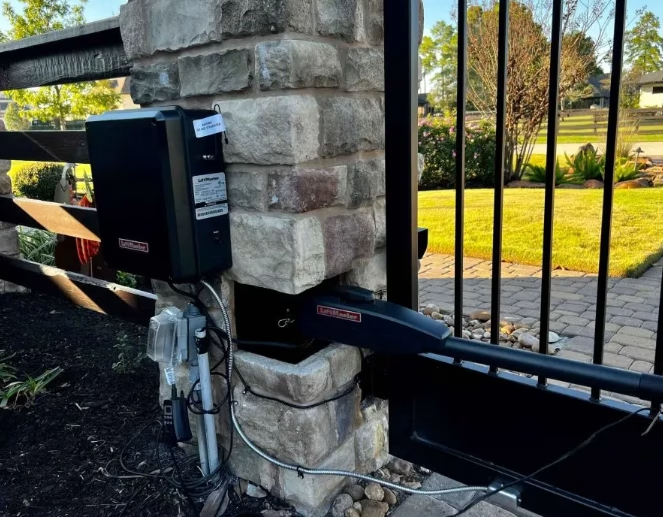
Step 1: Prepare Your LiftMaster System
Locate the “Learn” Button
- Find the “Learn” button on your LiftMaster gate operator.
- It is usually located on the motor unit under a light cover or near the terminal strip.
- The button may be yellow, red, orange, green, or purple, depending on the model.
- It is usually located on the motor unit under a light cover or near the terminal strip.
Activate Programming Mode
- Press and release the “Learn” button once.
- A small indicator LED light next to the button will turn on or blink, indicating that the system is in programming mode.
- You have 30 seconds to complete the next step before the mode times out.
Step 2: Sync the Remote to the Gate Opener
- Within 30 seconds of pressing the “Learn” button:
- Press and hold the button on your remote control that you want to use for gate access.
- Continue holding until the gate opener’s light blinks, or you hear two clicks from the operator.
- This feedback signals that the remote has been successfully programmed.
- Press and hold the button on your remote control that you want to use for gate access.
Step 3: Test the Remote Function
- Press the programmed button on the remote.
- The gate should open or close in response to the signal.
- If the gate does not respond, repeat the process, making sure to stay within the 30-second time window.
Step 4: Program Additional Remotes (If Needed)
- Repeat Steps 1 and 2 for each additional remote you want to pair with the gate opener.
- There is typically a limit to the number of remotes a LiftMaster system can support (consult your user manual for specifics).
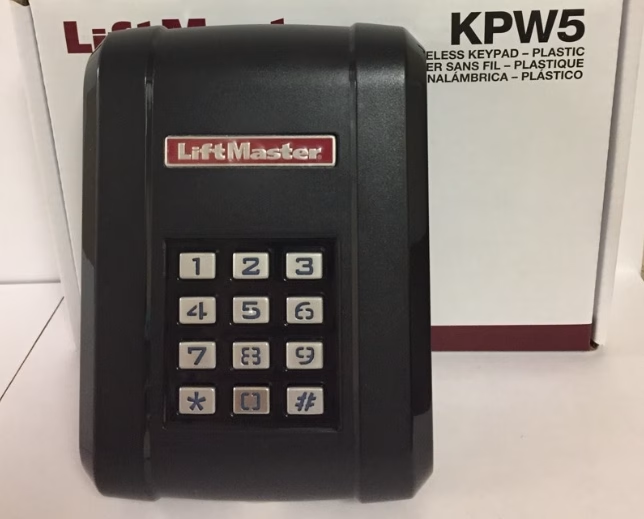
Programming the LiftMaster Keypad for Secure Entry
Installing and programming a LiftMaster wireless keypad allows for keyless, secure access to your property. Whether you’re setting it up for the first time or updating your PIN, this step-by-step guide will help you program your keypad with confidence and accuracy.
Benefits of a Wireless Keypad
Before diving into the programming process, it’s helpful to understand why a wireless keypad is a valuable addition to your LiftMaster gate opener:
- Keyless entry for family, guests, or service personnel
- Customizable PINs for better security control
- No need for remotes or keys, reducing the chance of loss or theft
- Weather-resistant and designed for outdoor use
Step 1: Prepare for Programming
Locate the “Learn” Button
- Open the control panel of your LiftMaster gate opener.
- Find the “Learn” button on the motor unit—typically near the wiring terminal or antenna.
- The button may be red, yellow, purple, green, or orange, depending on your model.
Activate Learning Mode
- Press and release the “Learn” button.
- The LED light beside it will glow steadily for about 30 seconds—this is your window to program the keypad.
Step 2: Enter and Program Your PIN
- On the keypad, enter a 4-digit PIN of your choice. Choose a code that’s secure but easy for you to remember.
- Press and hold the “Enter” button on the keypad.
- Release the button when the gate operator’s lights blink or you hear two clicks—this confirms that the PIN has been successfully stored.
Step 3: Test the Keypad
- Wait a few seconds, then enter your 4-digit PIN again on the keypad.
- Press Enter.
- Your gate should open or close in response, indicating that the keypad is functioning correctly.
Step 4: Changing or Resetting Your PIN
If you want to change your PIN or reprogram the keypad:
- Repeat Steps 1 and 2, using a new 4-digit PIN of your choice.
- The new code will overwrite the old one.
- Always verify by testing the keypad after reprogramming.
Tips for Troubleshooting LiftMaster Programming Issues
Even if you carefully follow the setup instructions, you might still encounter occasional issues during the programming process. Below are some common problems and practical solutions to help you get your LiftMaster system working smoothly.
Remote or Keypad Not Responding
- Check Battery Power
Ensure that the batteries in your remote and keypad are fresh and properly installed.
- Eliminate Signal Interference
Nearby electronic devices, such as routers or metal structures, can interfere with the signal. Try moving these away from the opener.
- Stay Within Operating Range
Ensure you’re standing within the recommended range of the gate opener when using the remote or keypad.
Programming Fails
- Use the 30-Second Learning Window
After pressing the “Learn” button on the opener, you must activate the remote or keypad within 30 seconds. Delays may cause the process to time out.
- Clear Existing Codes
If previous codes are interfering, press and hold the “Learn” button for 6 to 10 seconds until the indicator light turns off. This erases all codes and allows for a fresh programming attempt.
Gate Opens but Doesn’t Close (or Vice Versa)
- Inspect the Safety Sensors
Dirty, misaligned, or blocked sensors are a common cause of one-way gate behavior. Clean and realign them as needed to restore full function.
- Adjust Travel Limits
If the gate stops too early or doesn’t move fully, check the control panel settings for travel limits and adjust them to match your gate’s full range of motion.
When to Contact a Professional for LiftMaster Gate Programming

If your LiftMaster gate opener continues to malfunction after attempting to program it, it may be time to consult a gate access specialist. Common scenarios where professional help is necessary include:
- Repeated programming failure
- Wiring issues or damaged components
- Integration with smart home systems
Technicians from Central Valley Gates & Access Controls are trained in all models of LiftMaster systems and can ensure your setup is working safely and reliably.
Frequently Asked Questions
How to program a remote for a LiftMaster gate?
To program a remote for a LiftMaster gate, press and release the “Learn” button on the control board of the gate opener. Within 30 seconds, press the button on your remote control that you want to program. When the opener light blinks or clicks, the remote has been successfully programmed.
How to set up a LiftMaster gate opener?
Begin by installing the LiftMaster gate opener according to the manufacturer’s instructions, ensuring the motor, arm, and control box are securely mounted. Connect all wiring, power up the unit, and then program the remote and access devices. Test the gate’s open/close operation and adjust the limit settings if necessary.
How do I reprogram my LiftMaster gate code?
Access the control panel and press the “Learn” button until the indicator light turns off, clearing the old code. Then press the “Learn” button again, and within 30 seconds, enter a new code on the keypad or press the button on your remote. The indicator light will blink to confirm the new code is set.
How do I reset a LiftMaster gate opener?
To reset the LiftMaster gate opener, turn off the power to the unit for about 30 seconds, then turn it back on. You may also need to press and hold the “Learn” button on the control board for 6–10 seconds to erase all remote and keypad settings. Afterward, reprogram any access devices you use.
How to manually reset LiftMaster?
For a manual reset, power down the gate opener and disconnect it from any battery or solar sources. Press and hold the “Learn” button until the LED goes out, erasing all codes and settings. Once cleared, restore power and reprogram your remotes and keypads as needed.
Conclusion
Learning how to program a LiftMaster gate opener is essential for maintaining control and security over your gate system. By following the correct steps to sync your remote and keypad, you ensure reliable performance and user-friendly access for everyone who needs it.
While most homeowners can complete the programming themselves, knowing when to consult a professional is equally important. Complex setups, repeated failures, or integration with smart technology may require expert intervention.
For homeowners and businesses across the Sacramento area, Central Valley Gates & Access Controls offers experienced technicians and high-quality service for LiftMaster systems. Whether you’re installing, programming, or upgrading, we’re here to help you get the most from your gate.
End Note
Central Valley Gates & Access Controls is your trusted local expert for reliable, secure, and user-friendly gate access solutions. From custom vehicle gate installation to LiftMaster programming and beyond, our team delivers results that last.
Our gate operator installation and repair services are designed to support both residential and commercial properties. With dedicated solutions for Sacramento County, North Highlands, and Orangevale, we ensure coverage where you need it most.
Learn more about our company background, view our customer reviews, or connect with us on Facebook and Instagram. Ready to get started? Reach out through our contact page to speak with a local expert today.
Central Valley Gates and Access Controls
4817 Myrtle Ave Suite C, Sacramento, CA 95841, United States
+19167454011